A popular all-terrain vehicle (ATV) model is the Honda Rancher. However, it is not immune to problems. The angle sensor controls the Rancher’s engine performance dependent on the vehicle’s angle and inclination. This angle sensor sometimes malfunctions.
Honda Rancher angle sensor symptoms:
- Difficulty shifting gears
- Stalling or hesitation during acceleration
- Warning lights on the dashboard, such as the “check engine” light
- Rough idling or stalling
- Reduced overall performance, including decreased acceleration, lower top speed, or reduced towing capacity
This article describes the symptoms of a defective angle sensor in a Honda Rancher and how to diagnose the problem.
What is the angle sensor in a Honda Rancher?
The Honda Rancher’s electronic control module (ECM) includes the angle sensor. It is responsible for measuring the vehicle’s angle and inclination and transmitting this data to the ECM.
The ECM then utilizes this information to adjust the engine’s performance and prevent the vehicle from losing traction on uneven terrain.
A circuit board, potentiometer, and contact wiper make up the angle sensor’s various components.
The potentiometer measures the angle and transmits a signal to the ECM, while the contact wiper guarantees the signal’s precision and consistency.
Honda Rancher Angle Sensor Symptoms
There are several symptoms that may indicate a faulty angle sensor in a Honda Rancher.
These include:
1. Loss of power
If the angle sensor is not functioning properly, the engine may lose power, particularly on uneven terrain.
The ECM is unable to modify the engine’s performance because it is not receiving accurate information about the angle.
2. Difficulty Starting
A defective angle sensor can also make the ATV difficult to start. If the sensor is malfunctioning, it may not be able to detect the angle at which the ATV is positioned accurately.
This can prevent the engine from starting or cause it to start but promptly stall.
3. Stalling
Another common sign of a defective angle sensor is stalling. When the vehicle is on steep inclines or declines, or when turning abruptly, the engine may stall.
This is due to the fact that the ECM is unable to modify the engine’s performance based on the angle because it relies on outdated or inaccurate data.
4. Dashboard Warning Light
If the angle sensor is not functioning properly, warning indicators may illuminate the dashboard of the vehicle.
These lamps may include the check engine, oil pressure, and battery indicators. The precise nature of the issue will determine which indicators are activated.
5. Difficulty shifting gears
A faulty angle sensor can also result in difficulty shifting ratios, particularly on uneven terrain.
Because the ECM is not obtaining accurate information regarding the angle, the transmission may engage or disengage incorrectly.
6. Overheating
A defective angle sensor can also result in an overheated engine. If the sensor is malfunctioning, it may not detect the angle at which the ATV is being operated accurately.
This can result in the engine working harder than necessary and overheating.
7. Reduced fuel efficiency
Lastly, a defective angle sensor can result in diminished fuel economy.
This is because the engine is not operating as efficiently as it should, leading to increased fuel consumption and diminished performance.
What to Do If You Find Honda Rancher Angle Sensor Symptoms?
If you suspect that the angle sensor in your Honda Rancher is defective, there are a few diagnostic measures you can take.
Here’s a step-by-step guide:
Check the wiring
The first step is to examine the circuitry of the angle sensor. Check the wire harness for any visible signs of damage or corrosion, and ensure that it is properly connected.
If any damage is discovered, it may be necessary to replace the wire harness.
Test the resistance of the sensor
Use a multimeter to test the sensor’s resistance. To test the resistance of the angle sensor, use a multimeter.
Detach the sensor from the wiring harness and connect the multimeter leads to the sensor’s two terminals.
Resistance should change as the sensor is rotated at various angles.
Consult the service manual of your Honda Rancher for the precise resistance values that should be measured.
Inspect the sensor
Inspect the sensor for physical damage, such as cracks or fractured wires, after testing the resistance.
If you discover any damage, you must replace the angle sensor.
Test the ECU
If the angle sensor appears to be functioning normally, the ECU may be the source of the problem. Using a diagnostic instrument designed for your Honda Rancher, you can test the ECU.
This device will read the error codes recorded in the ECU, allowing you to identify any problems.
Test the voltage of the sensor
Also, a multimeter can be used to examine the sensor’s voltage. Connect the leads of the multimeter to the sensor’s terminals, and then start the engine.
As you rotate the sensor to varying angles, the voltage should increase.
Check the gear display
If your Honda Rancher is still having problems, inspect the gear display on the dashboard. If the display indicates the wrong gear, the angle sensor may be faulty.
If you are uncertain about any of these procedures, it is always best to consult the service manual for your Honda Rancher or take it to a qualified mechanic for diagnosis and repair.
A faulty angle sensor can cause serious performance issues with your ATV, so it is crucial to address the issue as soon as feasible.
How To Fix the Honda Rancher Angle Sensor Symptoms?
Angle sensors can be repaired rather than replaced. Follow these steps to fix it:
Step 1
- First, use the razor to mark the sensor housing and backplate so you can place the plate during reassembly.
- Look on the sensor’s engine side for a thin ring around the backplate. Slide your razor under this lip and cut around, breaking the lip.
Step 2
- If the backplate hasn’t popped out, carefully remove it (there’s a spring underneath). Remove the brush carefully.
- Be careful not to bend or break the contact brushes’ delicately stranded metal tips.
Step 3
- Remove the resistance strip retaining clip with needle nose pliers or tweezers, then carefully remove the strip.
- Moisture usually oxidizes and corrodes the strip’s three minor contact sites. The sensor housing contact pins will also oxidize and corrode.
Step 4
- After disassembling, gently clean the sensor housing contacts using a needle file or sandpaper. Spray them with an electronics cleaner. When cleaning resistance strip contact points, be very careful. Thin metal strips make these contacts easily breakable. These should not be sanded.
- Apply dielectric grease to the sensor housing’s brush attachment after cleaning. The brush wheel will turn easier and repel moisture.
- Insert the brush wheel without damaging the brush tips.
- Reinstall the spring as it came out and place the backplate onto the spring.
- Squeeze back together into the housing and align the backplate with the marks you made in the beginning.
- Use super glue. After the glue dries, remove the clamps and apply glue all around. Once dry, use your meter to test again following the service manual’s guidelines to confirm your work.
Step 5
- Reinstall the sensor in the bracket.
- Seal the engine case using Permatex Ultra Black silicone over the O-ring.
- Preload the bolts before reinstalling the sensor and torque to specs. Reattach the harness and lubricate the plug.
When Do You Need to Replace the Angle Sensor?
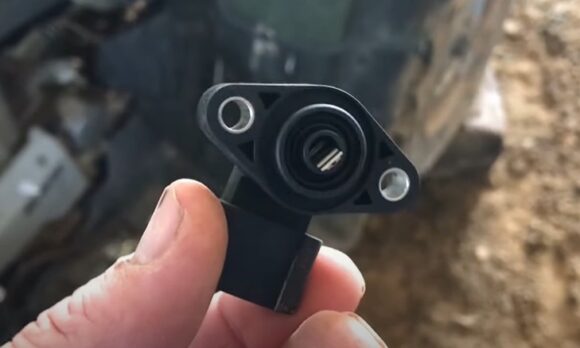
Angle sensors consist of two contact brushes fitted to a tiny spring-loaded wheel that turns along an electrically conductive strip that varies in resistance.
Mechanically, the sensors are fine until they’ve been physically damaged or worn out.
The O-ring that seals the sensor to the engine case can dry up and shrink, allowing water to enter via two small holes in the backplate and around the sensor shaft.
This can cause oxidation on the contacts, which increases resistance, or disrupt the contact points, which gives incorrect readings and error codes, resulting in the sensor being trashed and replaced.
Yamaha Grizzly vs Honda Rubicon
Honda Foreman 500 Angle Sensor Reset